Xinet provides an Uploader Manager which allows administrators to pre-configure and distribute
Uploaders to users who need to upload assets to the server. This, however, can be time consuming when many users require
Uploaders with different settings. To solve this problem, Xinet Portal includes
{DISTRIBUTOR_LINK} tag family, that when used in a site, makes it possible for users with proper permissions to download their own
Uploaders on-the-fly.
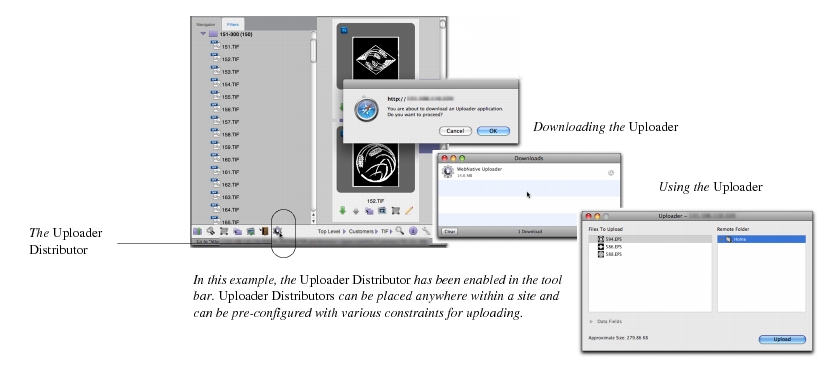
While you can implement this with other variations, Figure shows what the end user sees when the
Uploader Distributor has been enabled in an
Exhibit site tool bar.
To use Uploader Distributors, you must add your Xinet Portal server as a
Managed Server within the
Uploader Manager and set up a
Default Uploader. The
Default Uploader contains the constraints that will be used when Xinet Portal distributes
Uploaders.
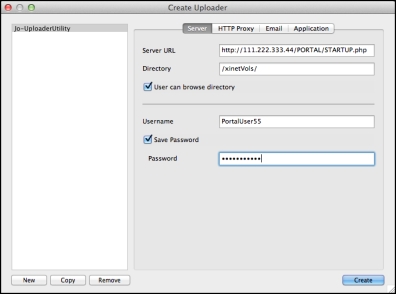
When configuring the Default Uploader, the administrator defines a
Username/Password, the location to which uploads are allowed, and a variety of other settings (e-mail notification, proxy e-mail servers, etc.). When a Xinet Portal user requests an
Uploader, the Xinet Portal server will generate a new
Uploader application which the user can download. The
Uploader application will contain most of the
Default Uploader configuration settings (e-mail notification, etc.). The
Username/Password in the
Default Uploader configuration, however, will always be replaced by the
Username/Password for the user who requested the
Uploader. The location to which uploads are allowed depends on the template where you place the
{DISTRIBUTOR_LINK} tag family.
Templates come in two varieties: those that are “working-directory-aware” and those that are not. For instance, the Browse,
Search, and tool bar templates know which directory the user is working within. The
Toplevel and
Collection templates do not. When a user downloads an
Uploader from a place on the site without a working directory, for example, from
Toplevel or from inside a
Collection, the
Uploader will place files in the directory specified in the
Default Uploader; if , however, a user downloads an
Uploader from a location with a working directory, for example while browsing or searching, then that directory overwrites the upload location in the
Default Uploader.
The tag family {DISTRIBUTOR_ICON},
{DISTRIBUTOR_DISPLAY},
{DISTRIBUTOR_LINK},
{LANG_DISTDL} ship inside the
toolbar.tmpl.html file in the base
Exhibit sites. To enable it there, you simply use the
Show Distributor button in the
Site Manager’s
Configuration page. To enable it elsewhere, place the tag family within one of the templates found in the
.../Site_Name/templates directory.
When you have finished you should see a Default Uploader configuration for your server in the
Uploader Manager. If everything is working properly, after authentication, you should, as a test, be able to download a copy of the
Uploader using:
It is possible to establish more than a single Default configuration. For example, you might want to have one setting for
User A and another for
User B. To do so, create
Uploaders for each. Then include the PHP variable
$configName in your site’s
local.inc.php file, pointing users to the appropriate
Uploader as shown in this example:
where demo would be the name of
User A;
settingA,
the name of the
Uploader to use with that user; and
settingB,
the name of the
Uploader to use for the other user.