Administration Guide : Working with Xinet Data Fields : File Info Panels

File Info Panels
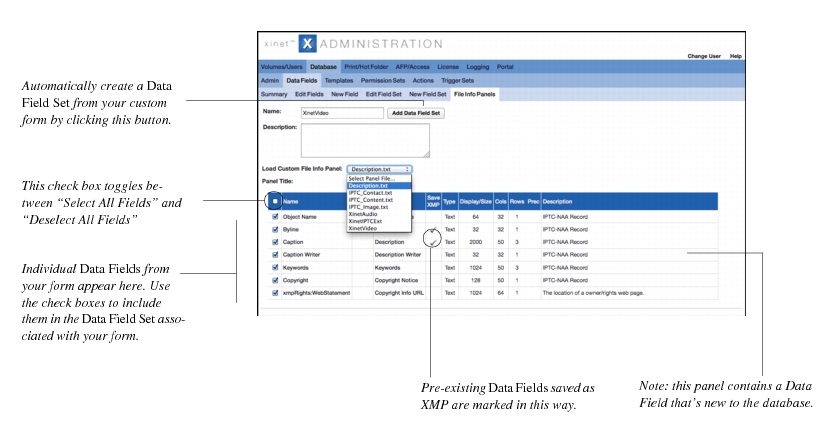
If your site is using or intends to use custom File Info Panels, the File Info Panels page provides shortcuts for introducing those forms and their data into the Xinet database. You can use this page to automatically enter new Data Fields from your forms and to automatically build new Data Field Sets based on them. When you introduce a new form, Xinet checks its existing Data Fields and makes sure it is not creating any duplicate Fields when it adds new ones to its database. It will only add unique new fields.
If you would like more information about creating your own XMP File Info Panels, refer to http://www.adobe.com/devnet/xmp.
Xinet ships with a few panels for you to use as examples:
You will find these in the directory listed in Step 1 below.
To introduce a custom panel:
1.
Unix: /usr/etc/venture/var/panels
Windows: C:\Progam Files\Xinet\Venture\var\panels
2.
Click Database > Data Fields > File Info Panels and select your custom panel from the Load Custom File Info Panel pop-up list.
3.
4.
Use the check boxes to determine which Data Fields to include in the new Data Field Set you are building based on your form.
5.
Configure any Data Fields that yo are introducing to the database for the first time, using the various type-in boxes and pop-up lists.
If want a more “natural” label for the Field, define a local.js variable by including that option and adding a label in the type-in box. It’s also a good idea to include a description of the Field.
6.
Click Add Data Field Set.