Please remember that each Xinet administration page displays a Help button. If you need definitions for any of the terms used or explanations about what the GUI does, click on the
Help button.
To begin administrative tasks, authenticate yourself as nativeadmin so that you will have full administrative privileges. Please see
Authenticating as the administrator for details. Then, keep in mind the conventions the following sections describe.
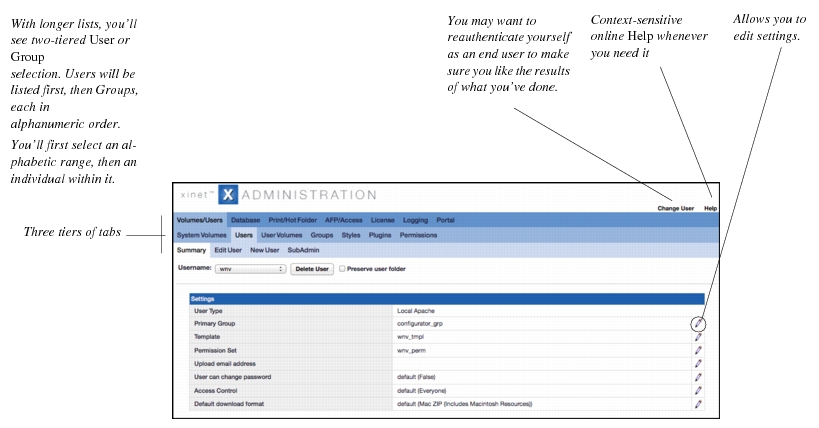
Figure 0-1 illustrates several tenets of the Xinet administration GUI. Across the top, there are three tiers of tabs.The top tier is fixed and represents the major areas of Xinet administration. The tabs in the lower two tiers, however, change according to the top-level tab that has been selected.
Figure 0-1 displays a a two-tiered pop-up menu. You will encounter this two-tiered pop-up system whenever a pop-up list grows longer than 29 entries. Its purpose is to speed up your selection process, saving you from having to scroll through too many list entries at one time.
In two-tiered mode, the upper pop-up specifies an alphanumeric range. In Figure 0-1, it specifies the users listed between
juno and
zander. The lower pop-up specifies the particular, selected user within that range,
tito, in our example. Also note that within these pop-up lists
Groups come after the list of
Users. Groups are also arranged in alphanumeric order.
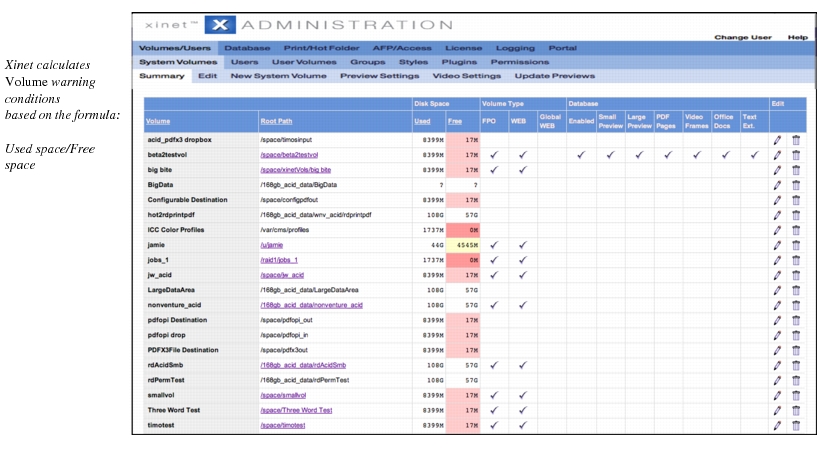
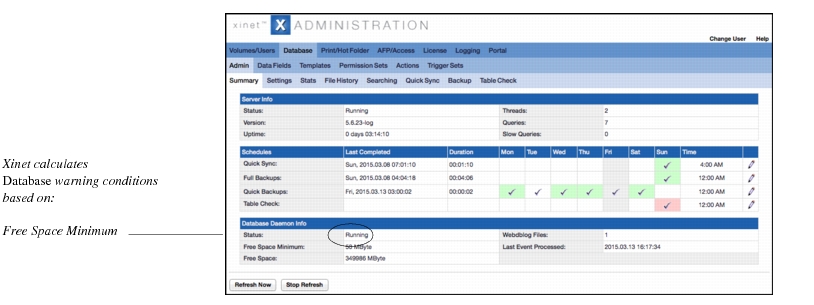
Colored background cells in the Summary pages indicate a lack of disk space; generally, the worse the situation, the more intense the color. The issue may pertain to published System Volumes or to the database. When you see such colors, check disk space usage on the system to see if more space can be allocated
. Figure 0-2 and
Figure 0-3 show examples of warnings: