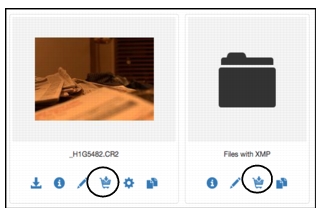
The Batch Image Order plug-in quickly converts and downloads a Collection of images. It can, for example, easily convert a collection of press-ready images into web-ready images or painlessly resize a large group of images for placement within another document.
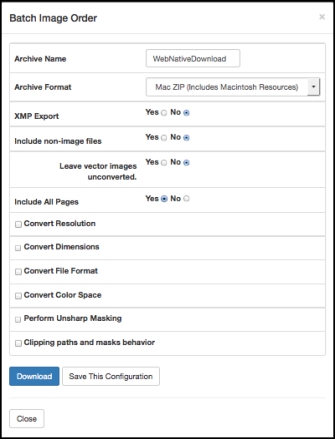
If you are using the Batch Image Order plug-in for the first time, its order form will present a number of parameters you'll need to set in order to customize downloading. This is where you provide information about conversion parameters such as file format, color space, and image size.
After your first custom Batch Image Order, the form will subsequently show the currently-loaded conversion configuration. However, you can alter these settings at any time by selecting the name from the
Saved Configuration drop-down menu.
First, use the pop-up menu to select whether you want to specify image resolution in dots-per-inch (DPI) or dots-per-centimeter (
DPCM). Then, specify the value of the output resolution in the type-in box on the right side. It must be an integer greater than one.
Note: You must use the same units of measurement when you tell the Batch Order tool to
Convert Resolution and
Convert Dimensions. If you have previously set dimension measurements so they are at odds with those you’ve just established for resolution, the dimension units will convert to match those for resolution. The opposite will happen if you set resolution measurements first and then change those for dimension.
You may constrain dimensions by height, width or
both. If you choose to constrain just
height or just
width, your images will retain their original aspect ratios. You may constrain either dimension to a range of sizes. If you don't want a range, type in the same value for both
Min and
Max. If you don't care about preserving the aspect ratio and want to specify absolute dimensions, click on both the
Height and
Width options and provide
Min and
Max values for each.
When the aspect ratio of the image is deformed, extra space in the new image can be dealt with in two ways. If Stretch Image is selected, then the image is deformed to fit its new dimensions. If
Leave Blank is selected, white space will be added to the border of the new image, with the original image centered.
You can have the Batch Order tool convert all images to a single format by selecting the
Convert File Format option and then selecting
EPS, GIF, JPEG, or
TIFF from the pop-up list. If you select either
EPS or
JPEG, you must also specify the compression level. A text box where you may type in an integer between
5 and
95 appears when you select
EPS or
JPEG. The integer represents the percentage of compression that will be performed on the images. Greater amounts of compression will speed up downloading, but may compromise image quality later on.
If you would like each converted image to bear an extension corresponding to the new image type, select Yes in the field labeled
Add filename extension. Otherwise, select
No and no extensions will be added.
Note: If an output format is not chosen, Batch Order will attempt to maintain each asset’s original format. If the original format is not a supported output format, however, it will be converted to a JPEG. Supported output formats include
GIF, JPEG, TIFF, EPS, and
BMP.
If you want to order all images in a given color space, click on the Convert Color Space option, and select the appropriate mode from the pop-up list. You may choose between
CMYK, Grey, LAB, and
RGB.
Note: The Convert Color Space setting interacts with the
Convert File Format setting, since some file formats don’t support all color space options. For example,
GIF is limited to
RGB, and
JPEG is limited to
RGB and
Grey. Therefore, your color space options will be constrained by the file format you select.
Input ICC Profile—The ICC profile for the device that captured the image. The default choice is to use the embedded profile (if the image has one). If you choose something else from the drop-down menu, it overrides the profile in the source image.
Output ICC Profile—The ICC profile used to describe the colorspace of the ordered images. Ideally this should reflect the device that will typically print/use the images.
Rendering Intent—Defines how the gamut of colors which can be created in one media can be modified when reproduced on a media with a different color gamut.
Enable BPC—Enables Black Point Compensation (BPC), a technique used in color-managed workflows based on ICC profiles.
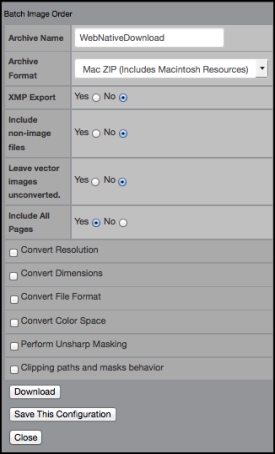
Once you’ve set up a Batch Conversion configuration, you can save it for easy re-use. There are two types of saved configurations: global and user-defined. Global configurations are prepared by the Xinet Administrator and are identified by the symbol “**” in the select box in the top right corner of the plug-in window. These configurations can be loaded and modified, but they cannot be deleted by anyone other than the Xinet Administrator. User-defined configurations can be saved, loaded, and deleted.
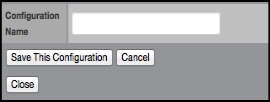
Click Save This Configuration type a name in the text box, click on the button labeled
Save This Configuration. Your saved configuration will now appear in the pop-up
Saved Configurations list for you to use for future
Batch Image Orders.
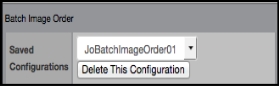
If a saved configuration is currently loaded and is not a global configuration, a button labeled Delete This Configuration will be visible. Clicking this button will permanently remove this configuration from the select box in the plug-in window.
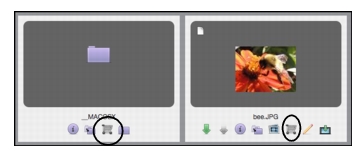
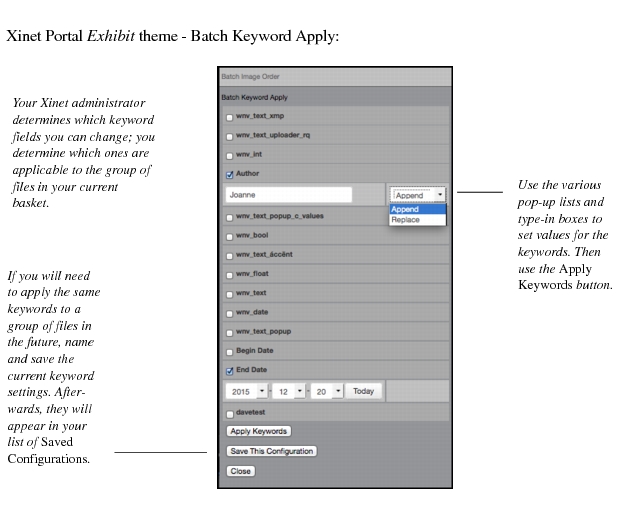
Batch Keyword Apply enables you to associate the same group of keywords with the group of assets in your current Collection. Clicking on the
Batch Keyword Apply icon opens a dialog box.