Client Guide : Using Xinet Portal : Download Multiple Assets through Collections

Download Multiple Assets through Collections
Xinet Portal provides a convenient collection feature for more efficient downloading of multiple assets at one time (formerly known as Basket in previous releases). Collection downloads give you the options to download XMP information with your assets. InDesign users can also drag-and-drop images directly from their Xinet Portal windows into open documents on their desktops.
If you intend to download more than one asset at a time, put the items in your Collection and download from there. Xinet will stuff and compress the collection, and your browser will automatically unstuff the assets in a much more efficient way than if you were to download them individually.
If you want to download images in a particular size or format, use the Custom Order button or the Batch Apply button in your Collection. Refer to Creating Custom Download Orders and Creating Batch Image Orders for details.
In this section:
See also:
Introduction to Collections
Types of assets that can be downloaded
Your Xinet administrator determines what you can see and download from your Xinet-hosted site. Most users will be able to download For Placement Only (FPO) images. Many may also be able to download High Resolution images and files. The options depend on how your Xinet administrator has set up your account.
For more information about FPO and High Resolution images, refer to Working with image proxies.
Working with XMP data
Whether or not XMP data is written into assets is up to your Xinet administrator. Those viewers who have permission to download high-resolution images also may export, when it exists, XMP data associated with the asset; one of the advantages of Collection downloads. There is a check box in the download confirmation dialog, which by default will not be checked. When you enable the option, the data will be delivered in a separate file having the same name as the image file, distinguished by an xmp extension to the name.
Understanding Collection Security
The contents of your Collection will be kept separate from Collections made by other users who have access to your account. So, if you fill a Collection, and the person sitting at the computer next to you also fills a Collection from the same volume, Xinet will keep track of your Collection separately. (Xinet actually keeps track of network addresses, so this is true only if you use different computers and/or different log-ins to access Xinet.)
Adding and Removing Assets from a Collection
You can work with Xinet on a asset-by-asset basis, for example, downloading FPOs one at a time, or you can use the Collection to perform an operation such as downloading a set of assets all at once. Once you have assets in a Collection, you can use Xinet Collection plug-ins to perform operations on the assets inside the Collection. Your Xinet administrator determines which plug-ins you see.
When you use Collection to transfer images, the collection of images are compressed before transferring and automatically decompressed when they reach your computer. This greatly increases asset transfer speeds.
To add an asset or a folder to your Collection:
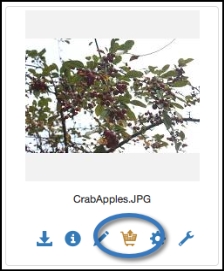
Click on the blue Add to Collection icon associated with the asset. Once clicked, the icon changes to yellow to indicate the asset is in the Collection:
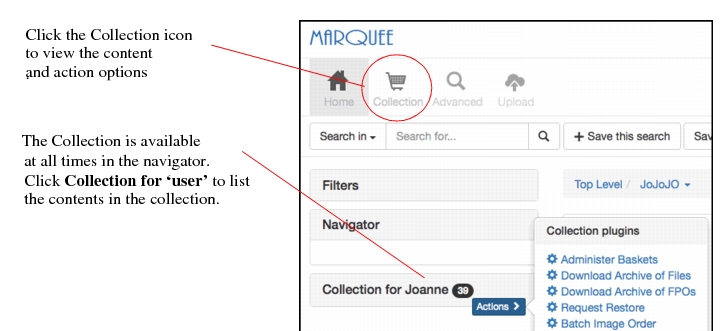
The first time you click on the Add to Collection icon, a new window, initially called Default Collection, will open where you can see the contents of your current collection. Any folders or assets you add to the Collection afterwards will be added to those already in the collection.
To add found assets from a search query:
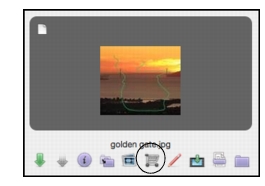
For the Marquee theme, after you complete a search query you can click the Collection icon at the bottom of the browser’s view to add all found assets to your Collection.
To remove an asset from the Collection:
Click the yellow Remove From Collection icon. The icon turns blue, indicating that the asset is no longer in the collection.
 
Note: Keep in mind that when you remove items from your Collection, you are not deleting the actual assets on the server; you’re simply removing a pointer to the asset from your collection.
View the Contents of your Collection
To view the contents of your Collection:
In the Marquee theme, on the navigator, click Collection for “user name”. Alternatively, click the Collection icon at the top right of the interface.
In the Exhibit theme, click the Show Collection icon at the bottom left corner of the interface.
Download Options
After you add assets to a Collection for download, you can set a number of download options.
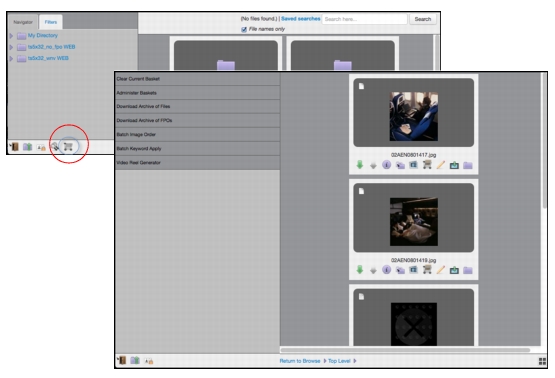
Clear Collection - Remove the contents of the assets added to your current collection.
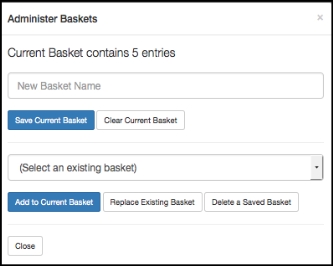
Administer Collection- Save your Collection for future use, clear, add to current collection, Replace Existing Collection, and delete your saved Collections. For more information, see Administering Collections.
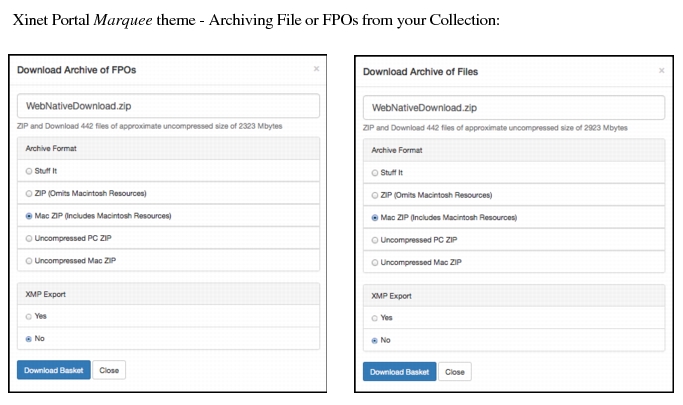
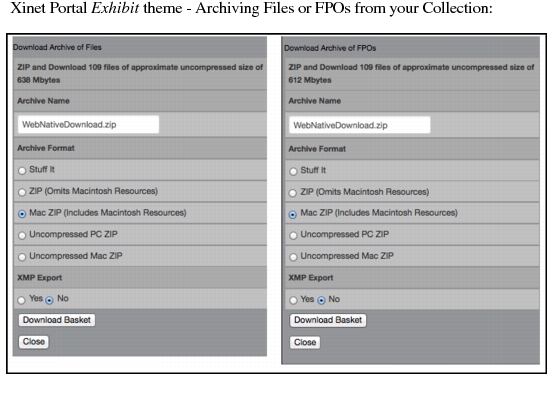
Download Archive Files - Set the archive format for your current Collection download, and specify if XMP data is included in your download. See Downloading Archived Collections.
Download Achieve of FPOs - Set the For Placement Only (FPO’s) archive format and specify if XMP data is included in your download of low-resolution images. See Downloading Archived Collections. For more information about FPOs, see Working with image proxies.
Request Restore - Restore archived files.
Batch Image Order - Set conversion parameters such as file format, color space, and image size. For more information, see Creating Batch Image Orders.
Batch Keyword Apply - Set which data field metadata keywords are assigned to the group of assets in your Collection. See Applying Batch Keywords to Multiple Assets.
Batch Report - Customize reports about the files in your collection. For example, reports can display information about keywords, provide Previews with annotations, skip the display of Previews, show All Available Previews associated with the files. Report can also number each annotation to facilitate easier discussion and be customized to show small, medium, or large thumbnails. Finally, reports can be rendered as printable PDFs in various page sized and orientations.
The following options are available for batch reports:
OptionBatch Report Option
Tip: This is useful information to locate keywords assigned to a group of assets.
Contact Sheet - Create PDF contact sheets that display the assets within their Collection. Users can specify what each contact sheet will look like.
When creating Contact Sheets, users can set any of the following options:
Page size and orientation of each contact sheet
The arrangement of columns and rows
The dimensions of the preview
The font size of any text fields
Whether to include QR codes which in the resulting PDF will provide URLS of each asset
Whether to show or hide Keywords in the contact sheet
Whether to include information about when the asset was created or last modified
Whether to include specific details from Image Info, Video Info, and/or Audio Info
The Contact Sheet PDF, once created, will stream in the User’s Web browser, from which it can be saved for redistribution.
Asset Fulfillment Request - Set administrative approval settings to your Collection files for a restoration requests before the files are placed in a retrieval area.
Video Reel Generator - Set Generation options, such as the output directory, width and height, quality, and format of your videos enclosed in your collection. For more information, see Creating Video Reels of your Collection.
Administering Collections
When viewing the contents of your collection, a number of administration options are available.
The top portion of the window allows you to save the contents of your current Collection with a name so that you can use that collection of assets at a later time without having to recollect the assets. You can collect other Collections of assets without disturbing a named and saved Collection.
Once you’ve saved a Collection with a name, Xinet allows you to use the contents at a later time: you make the collection an “active” Collection. What that means is that you can perform regular collection activities, such as downloading FPOs or high-res images.
To save a Collection:
1.
Type a name for the Collection in the New Collection Name type-in box.
2.
Click Save Current Collection. The newly-named Collection will be added to the Existing Collection pop-up list in the middle of the collection administration window.
To make the contents of a saved Collection “active”:
1.
Select the saved Collection by name in the Existing Collection pop-up list.
2.
3.
Click Close to return to the Collection window, where you’ll now be able to do something with the asset collection you’ve just placed there.
Downloading Archived Collections
You can download archived files or FPOs from your collection. The same configuration options are available for both types of archives. This section describes these interactions, which vary, according to permissions granted by the Xinet administrator.
To make a archived download:
1.
Click Show Collection, at the bottom of the Portal browser window, to see the contents of your Collection.
2.
On the left column, click either Download Archived Files or Download Archived FPOs. Both display the same options.
3.
4.
5.
In the XMP Export section, select the Yes radio button to include XMP metadata in your download.
6.
Click Download Collection.