Portal Administration Guide : Xinet Portal Server Properties : Editing, Adding or Removing Portal Server Sites

Editing, Adding or Removing Portal Server Sites
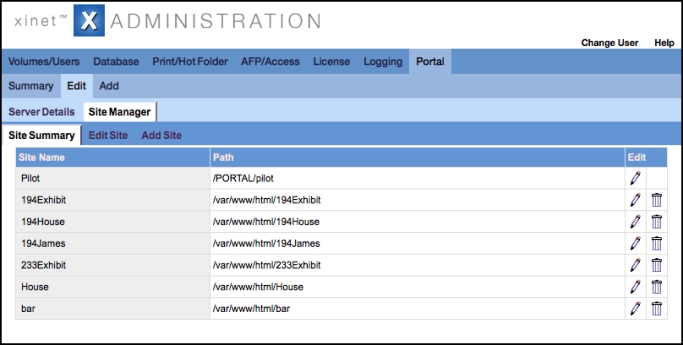
The Portal > Edit > Site Manager page displays a Summary page listing all site names created, their URL path, names and the ability for an Administrator to edit or remove a site.
To edit a site:
1.
Click Portal > Edit and select the Portal server from the drop down menu.
2.
Click Site Manager > Edit Site, select a site from the drop down menu, and click Submit.
Alternatively, click the edit icon on the Site Summary page for the appropriate site you wish to edit.
The Configuration page is displayed.
3.
To remove a site
1.
Click Portal > Edit and select the Portal server from the drop down menu.
2.
Click Site Manager > Summary, click the trash can icon to remove the site for a selected Portal server.
To add a site:
1.
2.
Click Portal > Edit > Site Manager > Add Site.
3.
In the Site Name field, type the URL for your new site.
For example, http://localhost/New_Site_Name.
4.
In the Site Path, type the path for your new site. For example, /var/www/html/joanne.
(Don't append the Site Name to the Site Path.)
5.
In the Template Set, select a pre-defined template.
By default Marquee and Exhibit templates are listed in the drop-down menu. You will have ample opportunity to make changes to the theme you choose as you continue configuration. For more information about templates, see Xinet Templates—the Templates Subtab.
6.
Click Submit.
The Site Manager, Edit Site, Configuration page will open for the new site.Configure existing sites (below) provides details about further functionality configuration. The Theme Editor (for Exhibit Sites) provides details about changes that effect the site's appearance.
7.
a). From the server upon which you installed Xinet Portal, direct a Web browser to:
http://localhost/New_Site_Name.
where New_Site_Name is the name of your recently created site. You should see the default login page.
b). Enter the valid Xinet user name and password into the login window and click Submit. If your installation has been successful, you should be able to see the user’s Xinet Volumes displayed in the navigator.