|
|
You create permission sets by granting permission for users to see and interact with fields within the parent template. You must create a Permission Set and assign it to Xinet users before metadata will be visible to them.
A user can see current values and edit them.• Pop-Up
A user can see current values and select another value from a pre-defined list of choices.• Locked
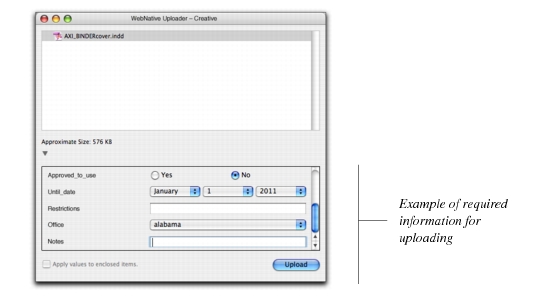
A user can see current values but not change them.The default selections here in Permissions follow from the settings in the Template—and in some cases, they will be left alone.One can also assign more restrictive permissions than given in the Templates. For instance, a field that is Editable at the template level may be set to Locked at the Permission level. This makes it read-only for users assigned to this Permission Set. A different Permission Set, assigned to different users, might allow the fields to be editable.One cannot assign less restrictive permissions (for example. change a field Locked in Templates to be Editable in the Permission Set).A special workflow can be established where fields are defined to Use Current Values on the Data Fields page. In this case, the fields are pop-ups, but the list of possible values comes from the values currently entered into the field from any file on the server. This dynamically-created pop-up list changes as values are added for new files. In this case, some users should see it as a simple pop-list and others should be able to edit the field, to add new values. The field should be marked as Editable in the Templates tab, then marked as Editable for one and Pop-Up for another.Additionally, one might want a user to both be able to edit a field and to see the current pop-up list. This way one can see what values already exist before adding more (and avoid mistakes like adding Xinet as a value when Xinet, Inc. already exists, for instance. For this reason, it is possible to select both Editable and Pop-Up.The Uploader will require users to fill in metadata, depending on the settings in the table above. The following example shows some types of information the Uploader may require. (For an introduction on this utility, go to About Xinet Client Extensions and Plug-ins.)