Administration Guide : Administering Xinet Users : Enabling subadministrator

Enabling subadministrator
Overview
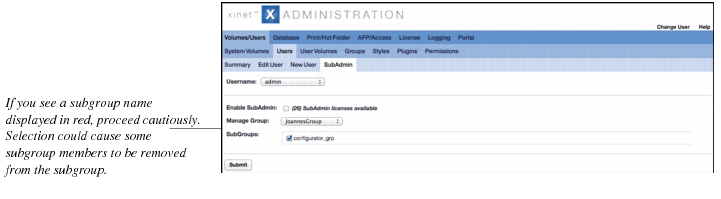
Xinet’s subadministration option allows you to give some users special permission to take over basic administration tasks without turning over full nativeadmin powers. For example, if you had a customer with a large number of users, you might want someone at the customer’s site to take on setting up accounts and passwords for users. This might be more convenient for the customer and benefit you by reducing your administrative overhead. The SubAdmin page under the Users tab allows you to set up subadministration.
When you give subadministration powers to a user, you give that user limited administrative powers over only a single group, and only over the volumes to which he or she already has access. Once empowered, the subadministrator can take on day-to-day administrative tasks for that group, but for that group alone. Other groups on the server remain hidden from the subadministrator.
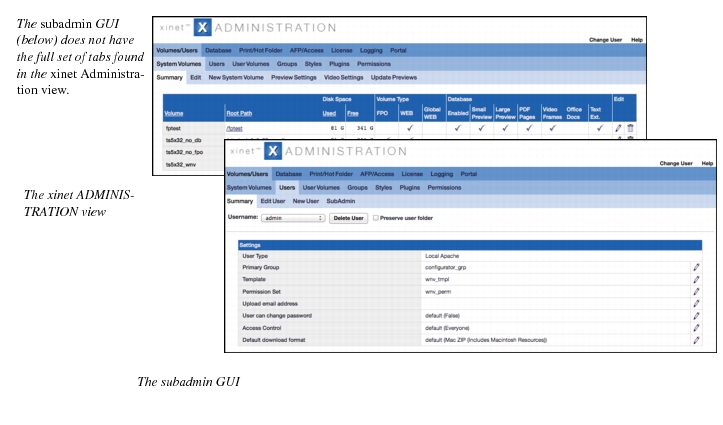
While authenticated as a subadministrator, the user sees a subset of the tabs you see as nativeadmin. Subadministrators do not have access to anything under the Styles tab nor most database-related tabs. Figure 0-12 shows the areas seen by subadministrators:
Figure 0-12 The subadministration GUI contains a subset of nativeadmin tabs.
This access allows subadministrators to take on such tasks as:
As nativeadmin, you can always see and change anything a subadministrator does. All activities are logged in the Web Access log, which you can filter to show Administration only. Unless you setup multiple subadministrators to a single group, one subadministrator will not have knowledge of any other subadministrator’s area.
Subadministration licensing
Each Xinet installation ships with a complimentary subadministrator’s license. If you would like to add additional subadministrators, please contact your Authorized Xinet Integrator.
Setting up a subadministrator
Please note that subadministration depends on having first set up groups. If you need help setting up groups, please refer to Creating and editing groups.
To set up a subadministrator:
1.
Under the Volume/Users, User tab, click on the SubAdmin link to open the subpanel.
Figure 0-13 Setting up subadministrators
2.
Choose a user name from the Username pop-up list. (Remember, the user needs to be a member of the group for which you’re enabling subadministration privileges.)
An asterisk next to a user’s name means that he or she is already a subadministrator.
3.
Check the Enable SubAdmin box.
4.
5.
6.
Click the Submit button when you are satisfied with your setting.
Thereafter, that Username will be identified as a subadministrator with an asterisk.
To remove a subadministrator’s rights:
1.
Go to the Volumes/Users, Users, SubAdmin page
2.
Select the Subadministrator in the Username pop-up list
3.
Uncheck the Enable SubAdmin button.
4.
Click the Submit button.
Things to tell Subadministrators
You may want to pass on information to subadministrators about authenticating themselves as a subadministrator. Here are the steps:
1.
2.
[This step may vary slightly, depending on user settings.] Go to your top level, click on the Preferences icon.
3.
Click SubAdmin.