Administration Guide : Setting up Xinet Volumes : Adding watermarks

Adding watermarks
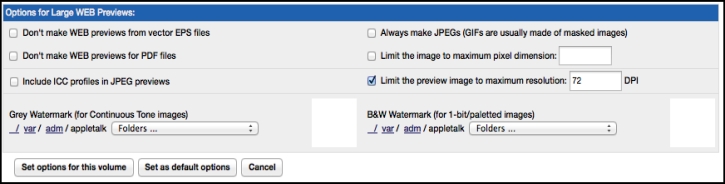
Watermarks optionally appear only on FPOs and/or Web previews; never on high-resolution images, unless you are also using Asset Timer features, in which case watermarks may also appear on high-resolution images. (See the Xinet Portal Administration Guide for a description of Asset Timer features; also, Summary Information, and Image Replacement options for the queue.) The use of watermarks help protect the images from unauthorized use, and also provide an easy way to make sure someone hasn’t mistakenly printed the FPO or an unauthorized or expired image.
You may use any kind of image Xinet knows about for your watermark. While the software will automatically convert the watermark for you into the form it needs, you will probably get the best results using images that you’ve designed specially for watermark use, one version for use on continuous-tone images and one version for use on black-and-white images. (In most cases, a black-and-white watermark would probably be too bold and distracting for use on continuous tone FPOs.)
Knowing something about how Xinet applies watermarks to images may help you design the watermarks more effectively; but, you should probably test any marks you intend to use. To test a watermark, you can either print the FPO or Web image or look at them with an image editing program such as Photoshop.
If necessary, Xinet converts any watermark image to black-and-white for black-and-white FPO images. Then, when it superimposes the watermark, it flips the pixel value for any part of the image which falls under a black pixel in the watermark, for example., black pixels become white and white black. The white pixels in the watermark do not affect the underlying FPO image.
Also if necessary, Xinet converts any watermark image to greyscale for continuous-tone FPO images. Then, when it superimposes the watermark, it converts underlying pixels based on the darkness of the pixel in the watermark. The darker the pixel in the watermark, the more the underlying pixel will be pushed towards 50% grey. White pixels in the watermark will have no effect on underlying pixels in the FPO image.
Besides the watermark’s color characteristics, you should also consider the size of your watermark design. Xinet superimposes the watermark pixel to pixel, so a 1,000 x 1,000 pixel mark would be too large. Smaller watermarks are probably better. If you are printing large pictures, Xinet will tile copies of the watermark across the image.
By default, on Unix systems, Xinet will look for watermarks in the file /var/adm/appletalk/watermarks/ and on Windows systems in C:\Program Files\Xinet\FullPress\Admin \watermarks\. Although you may keep your watermarks anywhere you want, this is a convenient place.
The procedure is identical for setting up Asset Timer, FPO and Web Preview watermarks. You’ll find each in its respective section of the Preview Settings page. To set up watermarking for a volume:
1.
2.
If you are not already looking at the Preview Settings page, open the Volumes/Users, System Volumes, Preview Settings page and select an appropriate volume.
3.
Find the Watermark options under the General image options, Options for FPO generation or Options for Large WEB Previews portion of the page. Figure 0-4 shows what they looks like.
Figure 0-4 Setting watermark options for a volume
4.
Set the Grey Watermark and the B&W Watermark independently. For each, use the interactive path to navigate to the directory where you have placed your watermark(s), then select the appropriate file.
A preview of the watermark will appear in the small frame next to the path.
5.
When you have finished selecting files, click the Set options for this volume button to lock in your choices.